Using the Start/Stop/Restart features in the Atavism Editor inside Unity have been working on the Virtual Machine only. With this addon you can control the custom Linux Server from the editor as well.
- Start by downloading the addon here: https://client.northnetworking.com/download/category/1/Atavism-downloads.html
- First, we must setup cronjobs on our server. You can enter the crontab by entering the following command:
Ubuntu: crontab -e
CentOS: crontab -e - The first time you enter the crontab, you will be asked which editor to use. Unless you have a specific preference, we suggest choosting Nano, as it is the easiest to use.
- Once you are inside the crontab, you will be presented by a screen like this:

- Here we will enter our cronjobs for the addon to work. Enter this into the crontab:
* * * * * php -f /root/AtavismRestart.php
* * * * * sleep 10 && php -f /root/AtavismRestart.php
* * * * * sleep 20 && php -f /root/AtavismRestart.php
* * * * * sleep 30 && php -f /root/AtavismRestart.php
* * * * * sleep 40 && php -f /root/AtavismRestart.php
* * * * * sleep 50 && php -f /root/AtavismRestart.php
* * * * * php -f /root/AtavismStatus.php
* * * * * sleep 10 && php -f /root/AtavismStatus.php
* * * * * sleep 20 && php -f /root/AtavismStatus.php
* * * * * sleep 30 && php -f /root/AtavismStatus.php
* * * * * sleep 40 && php -f /root/AtavismStatus.php
* * * * * sleep 50 && php -f /root/AtavismStatus.ph
When we are done, it will look like this: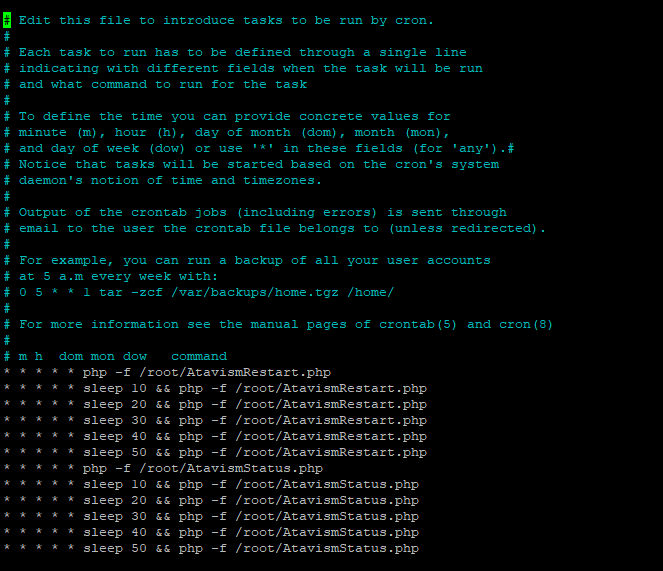
- Hold CTRL and Press O to save, then CTRL and X to exit nano
- Upload the content from the zip you just downloaded in to /root folder.
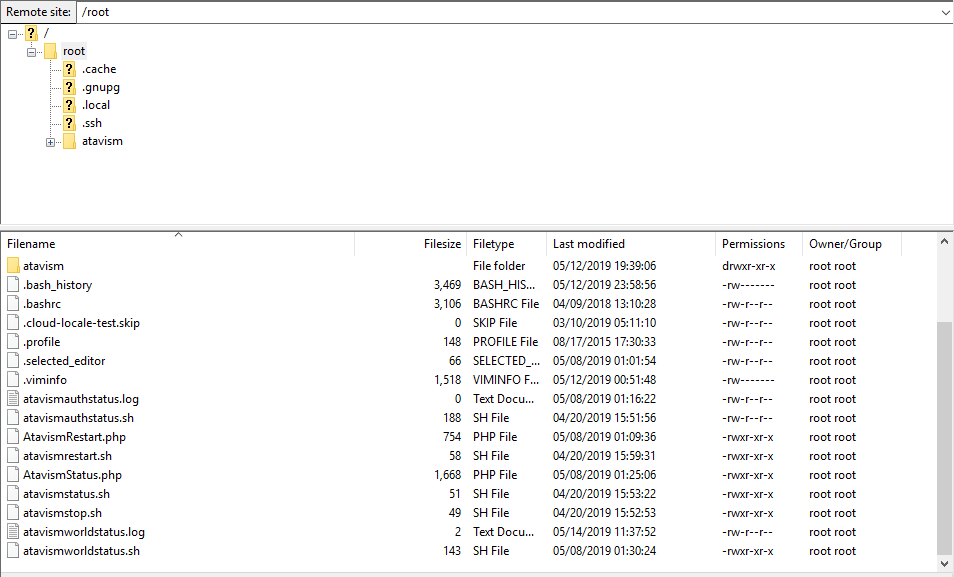
- You must open and edit the AtavismRestart.php and AtavismStatus.php and enter your database credentials, save by holding CTRL and pressing O and exit with CTRL and pressing X.
nano AtavismRestart.phpAlternatively you can edit the files before uploading
then
nano AtavismStatus.php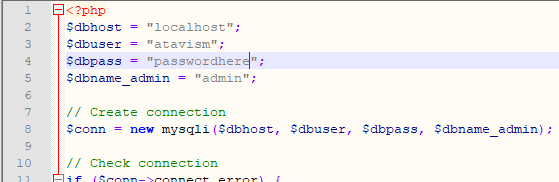
- After we have created our cronjobs and uploaded the files, we must install PHP on our server. This is quick and simple, and is done by following command:
Ubuntu: apt install php php-mysqli -yYou are now back to the main terminal windows and the server is running safely in the background
CentOS: yum install php php-mysqli -y - Now we must give our scripts the permission to be executed:
chmod +x atavismauthstatus.sh
chmod +x atavismrestart.sh
chmod +x atavismstatus.sh
chmod +x atavismstop.sh
chmod +x atavismworldstatus.sh - Once this is done, we can check if everything is working by running:
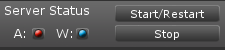
php AtavismStatus.phpIf nothing shows on screen after running the command above, everything works as it should. - You can now open up Unity and check if the Red status icons turns blue
Special thanks to Killersan at Dragonsan Studio for providing information and access to such amazing scripts.